
2016 Devinci Wilson Carbon
Size Tested: Large
Build Overview:
- Fork: Fox 40 Float
- Shock: Rockshox Vivid R2C / Fox DHX2
- Drivetrain: Sram XO1 DH 7speed
- Brakes: Sram Guide R
- Wheels: 27.5″ DT Swiss FR 570 / Hope Pro II
Travel: 204 mm
Blister’s Measured Weight: 11.48 lbs (frame w/ Vivid R2C Shock, 450# spring, seat collar and rear axle); 36.1 lbs as built (without pedals).
MSRP: $3,539.00 (Frameset including FSA headset and Rockshox Vivid R2C)
Reviewer: 5’9”, 155 lbs.
Test Location: British Columbia, Montana, Idaho
Test Duration: 2.5 months

The Wilson, Devinci’s downhill machine, has been in the lineup for quite a while. But last year it saw a major revision – it made the switch to 27.5” wheels, and underwent some changes in an effort to make it lighter and stiffer. The suspension design was also tweaked to make the bike even more progressive.
This year, the Wilson saw another change – the addition of a carbon option to the lineup. The Carbon Wilson has the same geometry and suspension as the aluminum version, but it comes in over a pound lighter.
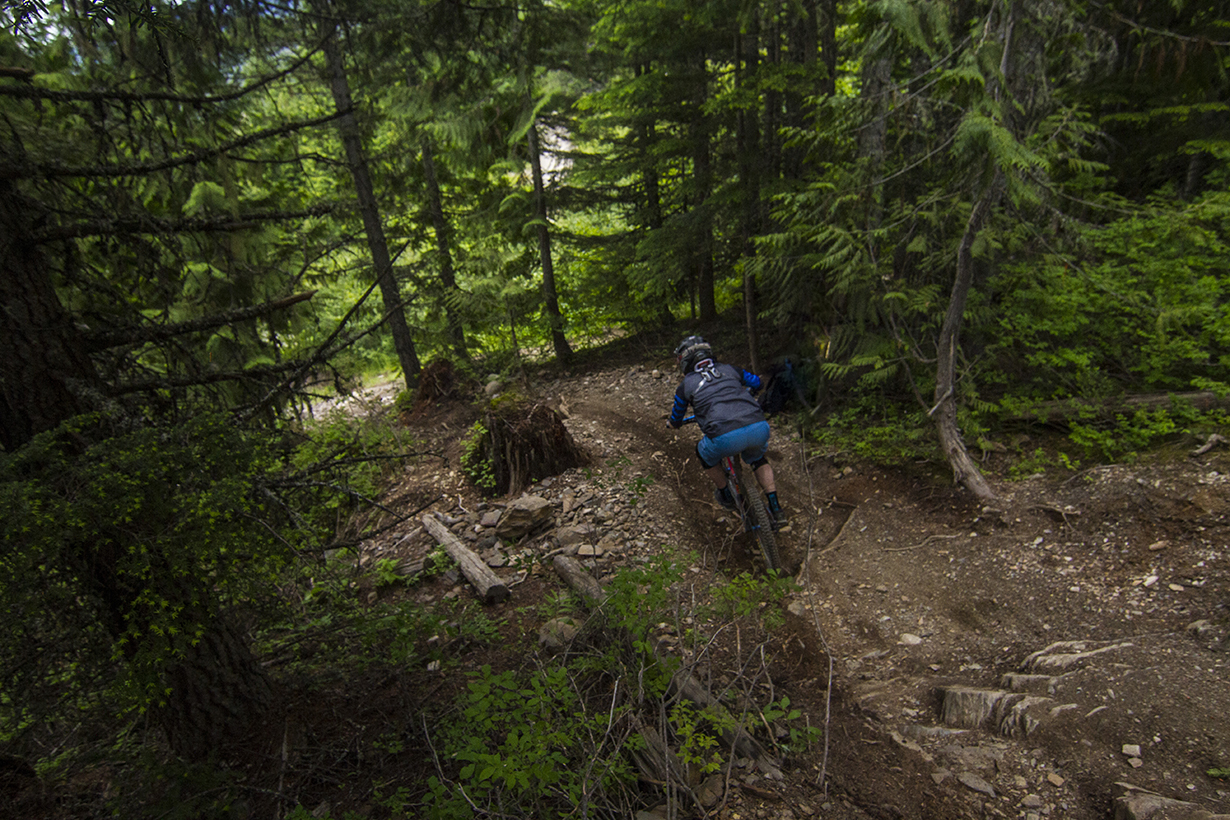
The Wilson was the race stead of the late, great Stevie Smith, and I can’t help but try to channel a little but of his awesomeness every time I jump on the bike. I’ve spent the last 2 ½ months thrashing the Carbon Wilson on trails everywhere from Whistler to Whitefish and I’ve found that the bike is a great contender in the “do everything well” category.

A quick note: I spend plenty of time wading through the minutia of geometry and linkage details. If you just want to know how the bike rides, feel free to skip to that section
The Build
I built my test bike from the frame up, but Devinci offers 6 different complete Wilsons – 3 build kits on the carbon frame, and 3 built kits on the aluminum frame.
While I swapped around parts a bit, most of my time on the Wilson was built as follows:
- Fork: Fox 40 Float
- Rear shock: Fox DHX2 w/ SLS Spring
- Drivetrain: SRAM XO1 DH 7 Speed
- MRP G4 Chainguide
- Time Z Pedals
- Brakes: SRAM Guide R
- Wheels: DT Swiss FR570 rims
- Hope Pro 2 Evo Hubs
- Maxxis Minion DHF / DHRII Tires
- Saddle: WTB Volt
- Cockpit: RaceFace Atlas DM Stem
- Raceface Atlas 35 Bar
The frameset that I tested only came with two pieces that weren’t made by Devinci: the Rockshox Vivid R2C rear shock, and an FSA zero stack headset. While I’ve had decent luck with other FSA models, the headset that comes with the frame is junk. It is literally impossible for me to drop the fork out without the inner and outer races of the headset separating, and as best I can tell, that’s just because it’s a really cheap bearing. For a $3500 frameset, I wish Devinci would include a better headset.
As for the Vivid R2C, try as I might, I just can’t bring myself to like that shock. For starters, it tops out, which I find to be extremely annoying. To solve the top out, I have to slow the low speed rebound down to a somewhat ridiculous level.
My other issue with the Vivid R2C, is that I find I bottom out the shock harshly and frequently, even when I’m running less than the 30% sag that Devinci recommends. And that’s noteworthy, because as I’ll discuss below, the Wilson linkage is quite progressive – reaching the bottom of its travel takes some doing. That bottoming out issue should be relatively easy to solve with a couple clicks of high speed compression, but the Vivid R2C is the only “high end” DH shock on the market lacking that adjustment. To solve the bottom out issue, my only real option is to either send the shock off for a re-valve, or bump up to a stiffer spring (which means less sag and less suppleness over smaller bumps).
The solution I went with was simply to switch shocks – most of my time on the Wilson was spent with a Fox DHX2 mounted up, and the bike rode far better with that unit – it’s more adjustable, and it’s more controlled in pretty much every scenario that I encountered.
Stock Builds
While I haven’t ridden a fully stock build of the Wilson, I have a decent amount of time on most of the parts that come on the various iterations of the Wilson. Devinci’s stock builds start with the XP, which has a pretty smart mix of parts that keep the costs down with a few great upgrades like nicer rims that’ll help the bike hold up to extended abuse. At around $3500 for the aluminum build, the XP is definitely a reasonably priced DH bike, although it’s pretty hefty.
The RC build in the middle sees the upgrades one would expect over the XP – nicer parts all around, and a Boxxer Team, which gains a charger damper over the Boxxer RC’s Motion Control unit on the XP build.
At the top of the line is the SL, which is a no-holds-barred pro level build. Guide Ultimate brakes, 7 speed XO1 DH drivetrain, Easton Havoc wheels, and a Boxxer World Cup are all components that you’ll find on plenty of top level pro’s bikes.
If I’m going to complain about those build kits, aside from the Vivid R2C, there’s only one thing I’d pick out: the 7 speed X01 DH drivetrain on the SL build – that’s the same drivetrain I’ve been running on my bike. When it’s working, it’s the best DH drivetrain on the market. When it’s working is the operable term there – as I mentioned in my review, the b-set plate on the rear derailleur is prone to snapping. I’ve gone through 5 of them so far this summer, and I literally have yet to make it longer than 4 days on that rear derailleur without it breaking. I’ve finally given up – I have a Shimano Saint derailleur on order.
NEXT: Frame Design and Details, Geometry and Fit, Etc.
You mentioned that the rear axle threads in from the drive side, making it awkward to pull the axle. Mine showed up the same way, which is annoying, but it’s easy to fix. The split pivot fittings can be pulled apart and swapped from side to side in about 5 minutes, allowing the axle to thread in from the non-drive side.
Keep up the excellent reviews!
Genius! Just swapped mine.
Hey did the Fox swap in easily in place of the Vivid to the yoke? I need to get rid of mine but have seen so many mixed reports on other shocks fitting – or not.
Thanks!
Hey Jon,
Yup – it was no big deal to swap it in, at least on mine. Obviously it needed the appropriate mounting hardware, but it didn’t need any work beyond that.
-Noah
Perfect! Having the R dial off the rear yoke make me think it should be easy but nice to have confirmation I don’t need to modify the yoke at all.
Thanks!
And what settings did you end up with for the WBP?
Pretty much every time I go to Whistler, my settings start out relatively soft (regardless of what bike I’m on), and on the slow side for rebound. But then, after a couple days when I’m starting to remember the lines and figure out how to go fast again, I ramp everything up. So by the end of the week, I usually have a few extra psi in the fork, maybe an additional 1 or 2 volume reducers, a few additional clicks on both the high and low speed compression, and I’ve usually sped up the rebound a bit to keep the rear wheel tracking in the chunder. And then on the last day or two of my trip, I end up softening things back up a little bit because my hands and forearms hurt, and I’d rather sacrifice a little performance in the name of comfort.
But at least on the Wilson, I seem to pretty much always have the DHX2 within ~5 clicks of the middle of the adjustment range for all of the adjustments.
sick it looks cool