
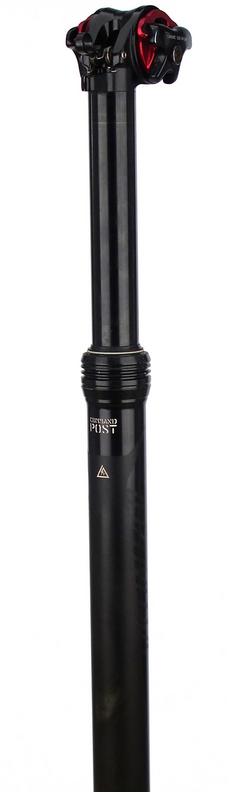
2013 Specialized Command Post BlackLite
Size Tested: 30.9mm Diameter, 125mm drop
Intended use: Increasing your coefficient of radness with the press of a button
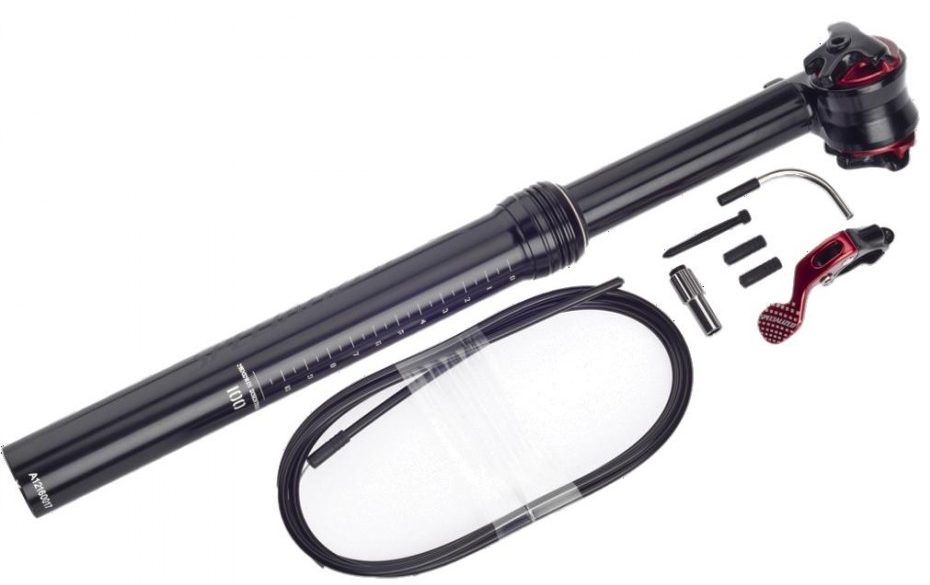
Weight: 560 grams (post, lever, cable, housing)
MSRP: $275
Bolted to: Specialized Enduro Expert
Rider: 5’9”, 150lbs
Test locations, alphabetically: Big Sky, Bootleg, Gooseberry, Fernie, Fruita, Hood River, Missoula, Moab, Sedona, Whistler, Whitefish
Test Duration: 6+ months
The Command Post BlackLite came on the Enduro Expert that I reviewed earlier this year. It’s one of the only commonly available, fully mechanical dropper posts on the market, the other common option being the Gravity Dropper.
I tested the 30.9mm diameter Command Post with 125mm of drop. It’s also available in a 31.6mm diameter, with 100mm and 75mm drops. Like the Gravity Dropper and several other posts on the market, the Command Post has three position settings: up, down, and an in-between setting that’s about 50mm (2 inches) below the top position.
Internals
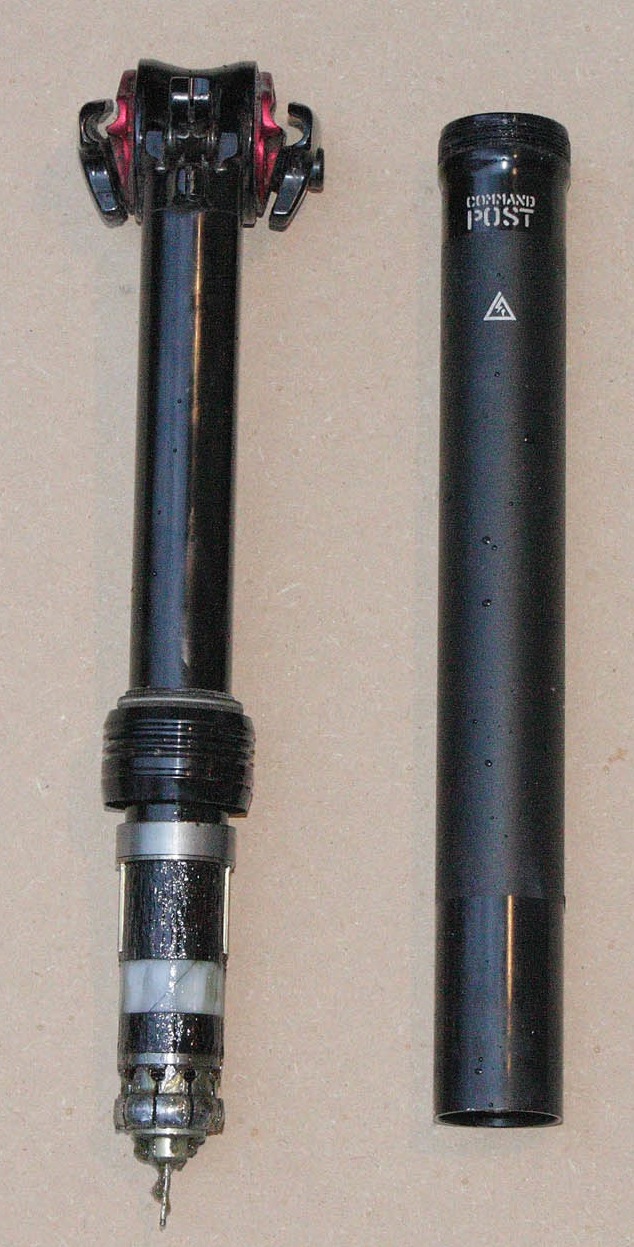
When I say that the Command Post is fully mechanical, I mean there’s no oil in the system to control its movement. There aren’t any valves, and the only seals are the ones to keep dirt out and air in (the Command Post uses an air spring). This makes the post relatively simple and arguably more reliable.
The internal workings of the Command Post are pretty clever. The post uses a spring loaded, expanding ring, which contracts slightly when you depress the post’s remote lever. This ring engages into grooves machined into the outer walls of the seatpost. When you press the lever, the ring disengages from the grooves, allowing the post to move up and down.
The movement of the post is controlled by an air spring—the bottom of the post has a schraeder valve, and air pressure can be set up to 40psi. More pressure means the post pops up faster.
A key feature of this design is that it’s entirely contained within the post. The obvious comparison here is the Gravity Dropper, which also uses a fully mechanical system, but it’s not entirely internal. Because the Gravity Dropper has holes drilled in the outside of the post, it requires a rubber booty to keep gunk out. The Command Post requires no such booty—it just needs a seal at the junction of the internal and external post.
Rebuildable
Despite the clever design, however, I still have some gripes about the Command Post’s internal workings. First and foremost, while the post is relatively easy to take apart, it’s not really rebuildable. Part of the beauty of the Gravity Dropper is that literally every part of the post is replaceable and easily available—this is not the case with the Command Post, and that became an issue for me. I had some problems with the post being a bit sticky (more on that below), so I decided to take the post apart. The culprit was the tight seal at the spot where the internal post slides into the external post, and I figured if I could lube up that tight seal, the post would slide more freely.
But the offending seal does not appear to be replaceable, and it’s hardly accessible. I jammed a bunch of lube into the general area of the seal, but my efforts didn’t do much other than make the post pretty sticky.
Like the seal, the majority of the post’s internals aren’t replaceable either. While I didn’t have any problems with any of these internals breaking or malfunctioning during my use of the post, I do wish that they were more serviceable.
Seatpost Head / Saddle Attachment
The saddle attaches to the seat via cone-shaped clamps, similar to those used on some other dropper posts such as the old Crank Brothers Joplin. A horizontal bolt runs through the series of cone-shaped plates that clamp the saddle rails when the bolt is tightened.
The primary benefit of this system is that you don’t have any bolts in front of or behind the clamping mechanism to interfere with the cable. The actuation cable on the Command Post attaches at the front of the seatpost head, so a traditional two-bolt clamping system would have some issues.
While this attachment system is fairly easy to use and the seat angle can be adjusted easily, it doesn’t actually hold the seat in position. With the bolt fully tightened, my saddle still rocks backward several times a ride. The only reason this isn’t more annoying is that the seatpost does such a poor job of holding the seat in place that I don’t even have to loosen the bolt to put the saddle back into position—I can easily do it with my hands.
Specialized isn’t the first company to use this attachment system, nor are they the first company to have problems with the saddle not staying put. That said, I cannot think of another seatpost (dropper or regular) I’ve used that has done a worse job of holding the seat in place.
It appears that Specialized has fixed this problem—newer versions of the BlackLite have a different seat clamp mechanism that, at least at first glance, looks like it will solve a lot of these issues. Granted, I haven’t seen one of these new versions yet (the 2014 Enduro 29 I rode at Interbike still used the older-style clamp).
NEXT PAGE: Actuation / Remote
Nice write up. I just retired a Command Post I got for my wife about 6 months ago. It was a good cheap way for her to test the waters of dropper posts, and a friend had highly recommended it. While she definitely got hooked on having dropper technology for jumps and downhills, she constantly struggled with the post.
As you mentioned, the lever was problematic. She runs a FD, so with the lever rotated up, she really had to compromise her grip on the handlebar every time she used it. This meant it was useless unless she could really plan ahead and have smooth trail to do it. The resistance on the lever was also pretty high, which exaccerbated this problem for her.
At 125 lbs, my wife also discovered that she had to but bump just to get the post to drop. Reducing the air spring pressure didn’t fix this problem. It seems to be inherent with the notches that the post rests in for the High/Medium/Low settings and only seems to affect smaller riders. Bummer for her.
Toward the end, her post started sticking down several times a ride. This was the last straw and now she’s totally happy on a KS Supernatural.
Agree with every single point… Pretty sure that when I got mine I could fire a full can of coke clean out of the earth’s orbit when releasing the post back to full height. I let some air out of the valve at the bottom of the post, and things were fine for a while (threat of castration temporarily banished), but then the internals seem to have become so sticky that releasing the saddle to full height requires me to pull it up with one hand whilst riding; I may as well have one of the old-skool models with the lever under the saddle, and no cables all over the place…
Agree with all above……came standard on my Stumpy. At first, sceptical as I ran a Reverb on my previous Zesty…which always needed high maintenance but worked well(Zesty and post!)…but it instantly got my approval as I like the simple 3 stage movement. But alas, the sticky issues set in….6 months on with 3 new cables and 2 returns to LBS I am told it has to go off to Spesh to be serviced. Looks like I will have to put my Reverb back on….OR return to old school seatpost and QR…..you know what, THAT THOUGHT HAS AN APPEAL!!
I have one of the original Blacklite posts (maybe 5 or 6 years old)? It has functioned flawlessly the entire time I have owned it! I have never even added air to it. The only thing I have ever done is move it to three different bikes, and replace the cable once. Granted the lever is a little stiff, and it does stick at the top a little, but hey, I never expected it to last this long. I can’t even imagine going back to a fixed seat post.
The only other comment is the need to super torque the clamp for the seat so it doesn’t tip. I just finally tightened it as hard as I could with a field tool while I was out on a ride, and it has stayed tight ever since.