
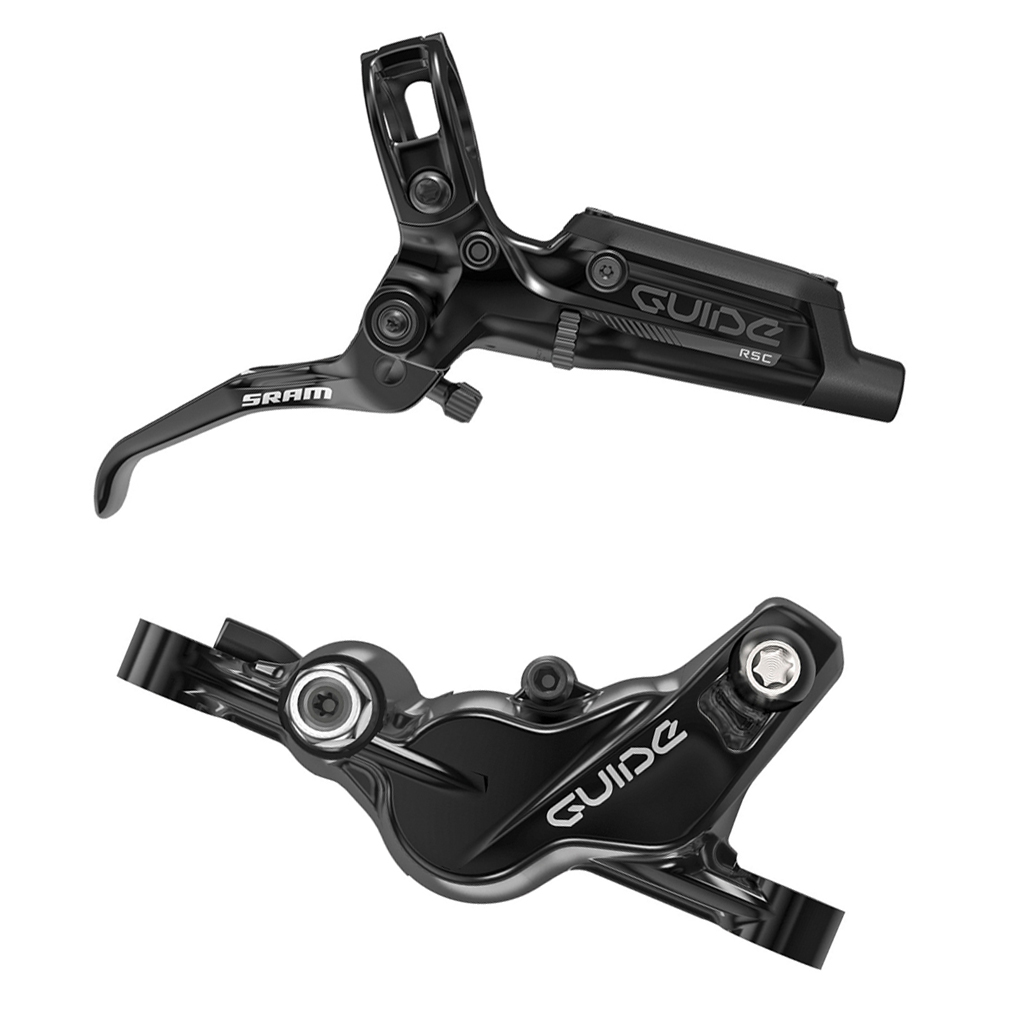
SRAM Guide RSC Brakes
Intended use: Lightweight stopping power
Weight:
• Front w/ matchmaker clamp: 264g (no adapter, no rotor)
• Rear w/ matchmaker clamp: 274g (no adapter, no rotor)
• Adapters and bolts: 35g each
• Rotor: 138g (180mm)
Rotors: 200mm front, 180mm rear
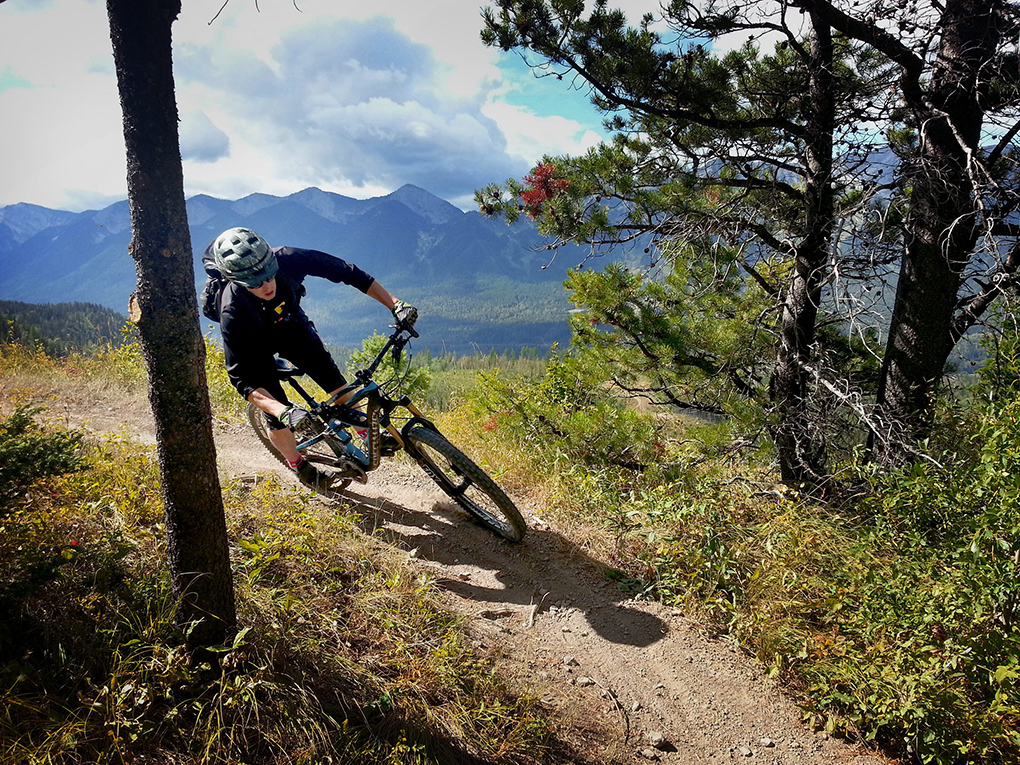
Bolted to: Specialized Enduro Expert
Rider: 5’9”, 155 lbs.
Test locations: Whitefish, MT; Fernie, BC; Vancouver, BC
Test Duration: 2.5 months
MSRP: $199 / brake
The new Guide series of brakes from SRAM are an evolution of their Avid brakes. The Guides bring a number of improvements to the table, and fix some of the issues that were common to the Avids.
A Bit of Background
I’ve primarily ridden Avid brakes for quite a while now. Over the last 10 years, I’ve probably had 20 different sets of Avid brakes, from BB7s to Juicys to a number of different Elixirs. While some of those brakes were certainly better than others, I’ve generally been happy with many of them, including the most recent Avid brakes I got – the Elixir 9 Trails, which had (a) pretty good power, and (b) the same Avid lever shape that I’ve been happy with in the past.
But while I’ve generally gotten along with Avid brakes, they haven’t been without their problems. Most notably, they tended to require frequent bleeding, and bleeding attempts weren’t always successful. The lever design would sometimes allow air to get into the fluid, which in my experience, would manifest itself as inconsistent lever pull.
On Avid brakes that required a bleed, I could “pump up” the lever—rapid squeezing would result in the lever pulling less and less with each stroke. This sensation made for some … ”exciting” braking action.
Older models of Avids were also a bit low on power. While modulation has always been pretty good on Avids, the two piston Avid brakes didn’t have nearly the stopping power of some of their competitors, namely Shimano. The four piston Elixir Trails improved on this; they’re still not quite as powerful as Shimano XTs, but they’re not far behind, either, and I found the power to be completely sufficient.
The SRAM Guide RSC
And now there is the new “SRAM” Guide RSC.
For some reason, SRAM has elected to split up the branding of their brake lines. Some brakes still carry the Avid name (Codes, Elixirs, etc.), while the Guide series appears under the SRAM name. But in this review, I’m considering the Guide RSC to be the next evolution of the Avid Elixir brakes.
Names aside, the Guide RSC features a completely redesigned lever mated to a four piston caliper that, aside from the paint and stickers, appears to be identical to the “trail” caliper used on the Elixir Trail brakes. The intent appears to be to improve the power of the Elixir Trails, while also addressing the bleeding issues that the Elixirs had.
The Guide lever has a couple of new features that are intended to improve upon the Elixir’s. First and foremost, the Guides use a “timing port” system that, along with the reservoir, allows air that might build up in the lever to escape. This theoretically prevents air from building up in the system like it did in the taperbore levers found on Elixir brakes.
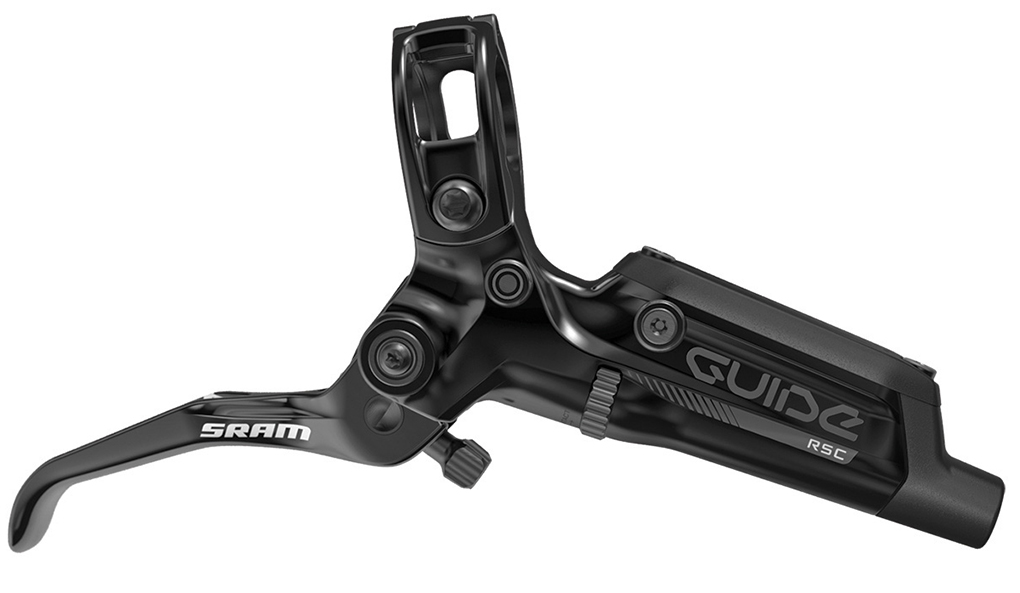
Another notable change on the Guide RSC lever is what SRAM calls “SwingLink,” which is a mechanism around the lever pivot that makes the pads move further at the beginning of the lever stroke than at the end. Essentially, this offers a bit of mechanical advantage and allows the pads to sit further out from the rotor without requiring the excessive lever travel before the pads make contact.
The Guides come in three flavors: the R, RS, and RSC models. I tested the top-of-the-line RSC model, which has the SwingLink mechanism noted above, bearings on the lever pivots, and both a reach and contact point adjustment.
Mounting and Bleeding
The Guide RSC utilizes the same bleed kit as the Avids; syringes thread into both the lever and the caliper. Also like the Avids, the Guides run on DOT fluid. In my Elixir 9 Trail review, I talked about why I prefer DOT fluid to mineral oil. I won’t rehash it all here, but it basically comes down to the fact that I can easily and cheaply buy DOT fluid pretty much anywhere.
I’ve now bled the Guides a few times, and it’s gone smoothly and easily; no complaints there. If you’re familiar with bleeding Avid brakes, the Guides won’t present any new problems.
The Guides are ambidextrous, which means they’re quick and easy to mount on either side of the bar, which is a bonus for Europeans who run their brakes backward. Like pretty much all products under the SRAM banner, the Guides play nicely with other SRAM products—they’re matchmaker compatible.
Adjustments
Like most high end brakes, the Guide RSC has both a contact point and a reach adjust. And just in case anyone isn’t completely clear on what these do:
• The contact point adjustment changes how much the lever needs to move before the pads contact the rotor, but changing that adjustment doesn’t affect the brake lever’s starting position relative to the bar.
• The reach adjustment changes the angle of the lever relative to the bar, so moving the reach out will make the entirety of the lever’s travel farther from the bar.
I found the contact point adjustment to be effective, although somewhat difficult to turn. It’s a small wheel that sits close to flush with the lever body.
While I was easily able to get it adjusted to where I wanted it when the brakes were new, now that the wheel has gotten dirty a few times, it’s a bit more reluctant to turn. On the upside, however, the contact point adjustment has a pretty wide range of adjustability, and you don’t need tools to make the adjustment.
The reach adjustment was also effective and, unlike the contact point adjustment, doesn’t have any access issues. My only gripe about the reach adjustment is that the knob feels fragile and it’s on the outside of the lever blade, meaning it’s prone to getting damaged in a crash.
It’s also important to note that the lever feel on the Guide RSC is extremely smooth. The bearings in the pivots ensure that the lever throw is never sticky, and there’s no slop in the lever blade.
NEXT: Power, Modulation, Etc.
Nice write up. Modulation is much more important to me than power, and I had the previous bubble bore Avids, so I would not have considered these brakes before reading your article. Thanks!
P
I realize this is coming a few years after the review, but I’m curious to hear about your trial and error to minimize how close the levers pull to the handlebars (I have the exact same preference and RSC brakes). I haven’t bled them yet, but I’m wondering if you played with the position of the “Contact Point” adjustment knob while bleeding to try and gain some extra distance between lever and handlebar. I found a few sources pointing to this YouTube video that suggests having the Contact Point knob ~1/2 way when bleeding allows for added adjustment. I’d love to hear your thoughts on this, and any other attempts you’ve made to gain your brake lever preference as I begin my relationship with these brakes. Very informative review as always!
Search Youtube “How to set up SRAM mountain bike disc brakes | MBR”
Hey Adrian,
Yeah – I’ve actually done a bunch of experimenting with this and have finally figured out how to get them to pull where I want them to.
As far as bleeding, I’ve done it with the contact point set all the way open, all the way closed, and somewhere in the middle. I find doing it with it open, and then closing it down after the bleed helps a little bit, but ultimately doesn’t make a huge difference. Regardless of how I do it, I find that the brakes work ok for me as long as they have fresh pads in them, but once the pads wear a bit, the lever pulls too close for my liking.
The solution I’ve found is that, once the pads wear a bit, I’ll do a pad advance. Sram’s procedure (which was developed for Avid brakes, but works on Guides too) can be found here: https://www.sram.com/sites/default/files/techdocs/gen0000000004358_rev_a_avid_brake_pad_advancement_product_installation_update_0.pdf
My quicker and dirtier version is to just drop the wheel out (so there’s no rotor in the brake), and give the lever one full pull to the bar. Yes, this goes against the conventional wisdom of never pulling the lever when there’s not a rotor in, but as long as you don’t pull the lever too many times, it’ll be fine. Giving it that single full pull will re-set the pistons in the caliper a little bit farther out, but not so far that they fall out or lose their seal (which is always the concern). After I do the pad advance, I just put the wheel back in and check the lever. Usually the contact point will be pretty far out, so I’ll use the reach and contact point adjustments to get the lever where I want it. If the lever still pulls too close to the bar, I’ll repeat the procedure. I’ll usually end up doing a pad advance 2, maybe 3 times over the life of a set of pads.
-Noah
Glorious. I’ve used an identical procedure for my shimano brakes between bleeds. Good to know it doesn’t take a PhD to get these brakes to work to my preference. Thanks again!
My shimano mtb 520 180mm resin pads haul me down better than my.guide 180mm sintered pads will go to 203mm rotor on . Front.